Lights Only - Pro Trim Sold Separate
Pro Trim is available Here.
WALLY'S PRO PERMANENT HOUSE TRIM
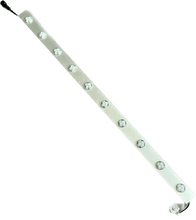
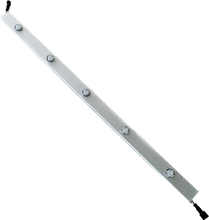
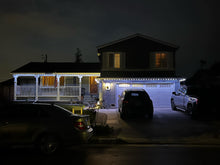
The pro pixel trim mounting system is an easy to use metal channel with holes pre punched. Each trim length measures to be 1 meter in length. We have our standard 5 lights per meter and our HD 10 lights per meter Trim sets. The aluminum channel and oversized pixels allow for a very clean look when permanently mounted to the soffit of a house.
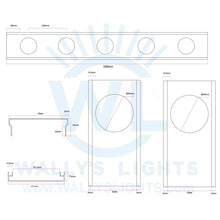
39.3" Length (1 Meter)
25mm Height
47mm Wide
Each Node has 3 LED's
12VDC
WS chipset
WRGB Vs RGB
WRGB is a 4 LED Pixel With White, Red, Green, and Blue LED's. These will require a controller that is setup to run 4 channels of color.
RGB is a 3 LED pixel with Red, Green, and Blue LED's. These require a controller that is setup to run 3 color data channels.
10 Lights Per Section Specs
Lights are 4" spaced in the 10 count HD Pro Trim sets
.5 Amps
6.2 Watts
12VDC
5 Lights Per Section Specs
Lights are 8" Spaced in the 5 count Pro Trim Sets
.25 Amps
3.1 Watts
12VDC
HOW DO YOU MOUNT PRO PIXEL TRIM TO YOUR HOUSE?
The trim has a front and back section which separate for permanent mounting. Remove the 2 halves and mount the back section onto the soffit or underside of your roof overhang. Push the front half into the channels in the back half after it's mounted.
WHAT ELSE DO YOU NEED TO GET YOUR PRO PIXEL TRIM UP AND RUNNING?
HOW DO YOU SETUP THE PRO PIXEL TRIM?
We like to start use the xlights software. There are many ways to achieve the same result but here is our normal flow.
- Import a picture of your house to your layout tab that you will be mounting these to.
- Plan where your controller will be mounted and where all of the "start" end of the trims will be.
- Use the single line tool and draw the lights onto your house. First click would be the "start" of that line.
- Name each section for easy reference during setup.
- Enter the amount of lights on each section
- Do this to all sections where you will add your PRO Pixel trim.
- Go to the controller tab and add your WB1616 Controller.
- Click Visualizer at the bottom right of the screen.
- Add your sections to the ports you'll be using on the WB1616.
- Upload inputs & outputs to the controller.
- Now you can control your lights through FPP with the web interface or with xlights.
What are the dimensions of Pro Pixel Trim?


